
Installation.
Firebase, backend, console, first key, app.
Do these steps in order. Each one ends with a check, so you know it worked before you move on. Plan about an hour the first time, plus the waiting time for Google to enable billing. You click through web consoles and paste commands; no coding is needed.
01Step 1 · Create the Firebase project
Firebase is Google's service that hosts the backend, the database, file storage, sign-in and push messages. You create one project for your app in your own Google account. Menu names below are those of the Firebase console in October 2026; Google moves items now and then, so if a name differs, use the search box at the top of the Firebase console.
- Create a projectOpen console.firebase.google.com, sign in with your Google account → Create a project (or Add project). Type a name, accept the terms, Continue. Google Analytics is not needed: switch it off and click Create project, then Continue.
- Switch to the Blaze planIn the left menu at the bottom, click the plan name ("Spark") → Upgrade → Blaze → choose or create a Cloud Billing account (card details) → Continue. Cloud Functions, Cloud Scheduler and calls to AI providers do not run on the free Spark plan. Blaze bills your own Google account for your usage (Costs); set a budget alert when asked.
- AuthenticationLeft menu → Build → Authentication (in some layouts Security → Authentication) → Get started → tab Sign-in method → Add new provider:
- Anonymous → Enable → Save. Required: every user gets an anonymous account first.
- Google (optional) → Enable → pick a project support e-mail → Save. On Android it also needs your signing key fingerprints (Release); on iOS it needs the
REVERSED_CLIENT_IDURL scheme inInfo.plist(Release → iOS sign-in). - Apple (optional) → Enable → Save. For the iOS app this is enough together with the Sign in with Apple capability in Xcode; for the web build Apple also needs a Services ID and key (Apple Developer → Certificates, Identifiers & Profiles).
- Email/Password (optional) → Enable the first switch → Save.
- FirestoreLeft menu → Build → Firestore Database (or Databases & Storage → Firestore) → Create database → Standard edition if asked, Database ID
(default), choose a location close to your users (it cannot be changed later) → Start in production mode → Create. The deploy in step 2 installs the real security rules. - StorageLeft menu → Build → Storage → Get started → production mode → same location → Done. Generated images and AI videos are stored there.
- Cloud MessagingNothing to switch on for Android. For iOS push, upload your APNs key later (Release).
Check: the project shows "Blaze" in the left menu, and Authentication → Sign-in method lists Anonymous as Enabled.
02Step 2 · Deploy the backend
This uploads the API to your Firebase project. In a terminal, from the source/ folder of the download:
npm i -g firebase-tools        # once
firebase login                 # opens the browser: sign in with the same Google account
cd firebase
firebase use --add             # pick your project; writes .firebaserc
cd functions && npm ci && cd ..
firebase deploy --only firestore:rules,firestore:indexes,storage,functions
Terminal: macOS or Linux as shown; on Windows use WSL or Git Bash (how).
- Region. The default is
us-central1. To use another region, before deploying copyfunctions/.env.exampletofunctions/.envand setFUNCTIONS_REGION(for exampleeurope-west1). Use the same region in the app'sAPI_BASE_URL. - The deploy prints the URL of the
apifunction. Your API_BASE_URL is that address, usuallyhttps://us-central1-<your-project-id>.cloudfunctions.net/api, with no slash at the end. - The first deploy enables the Google Cloud APIs it needs, which can take a few minutes. If the CLI asks to enable an API, answer yes.
Allow signed download links
The API gives the app a signed download link for each generated image and video. Google needs one permission for that:
- Enable the APIOpen console.cloud.google.com, pick the same project at the top → APIs & Services → Library → search "IAM Service Account Credentials API" → Enable.
- Grant the roleIAM & Admin → Service accounts → click
<project-number>-compute@developer.gserviceaccount.com(the account 2nd gen functions run as) → tab Permissions (or Principals with access) → Grant access → New principals: the same e-mail address → role Service Account Token Creator → Save.
Without it chat works, but image generation answers 500 internal (Troubleshooting).
Check:
curl https://us-central1-<your-project-id>.cloudfunctions.net/api/v1/healthTerminal: macOS or Linux as shown; on Windows use WSL or Git Bash (how).
Expected: {"ok":true,"version":"2.0.0","ai":"no_key","images":"no_key","tts":"off","transcribe":"off","video":"off","discover":"off","demo":false,…}. no_key and off are right at this point: no provider key is set and every paid module ships off.
03Step 3 · Start the operator console
- Get a service-account keyFirebase console → gear icon → Project settings → tab Service accounts → Firebase Admin SDK → Generate new private key → Generate key. A JSON file downloads. Save it outside the project folder and never commit or share it: it gives full access to your project.
- Configure
cd admin
npm ci
cp .env.example .env
openssl rand -hex 32           # copy the output into ADMIN_SECRET_KEY
Terminal: macOS or Linux as shown; on Windows use WSL or Git Bash (how).
Open.envin a text editor and setADMIN_SECRET_KEY(the 64 characters you just generated) andGOOGLE_APPLICATION_CREDENTIALS(the full path of the JSON file). Every variable is explained in Configuration. Back upADMIN_SECRET_KEYnow: it encrypts the keys you will store (why). - Start
npm startTerminal: macOS or Linux as shown; on Windows use WSL or Git Bash (how).
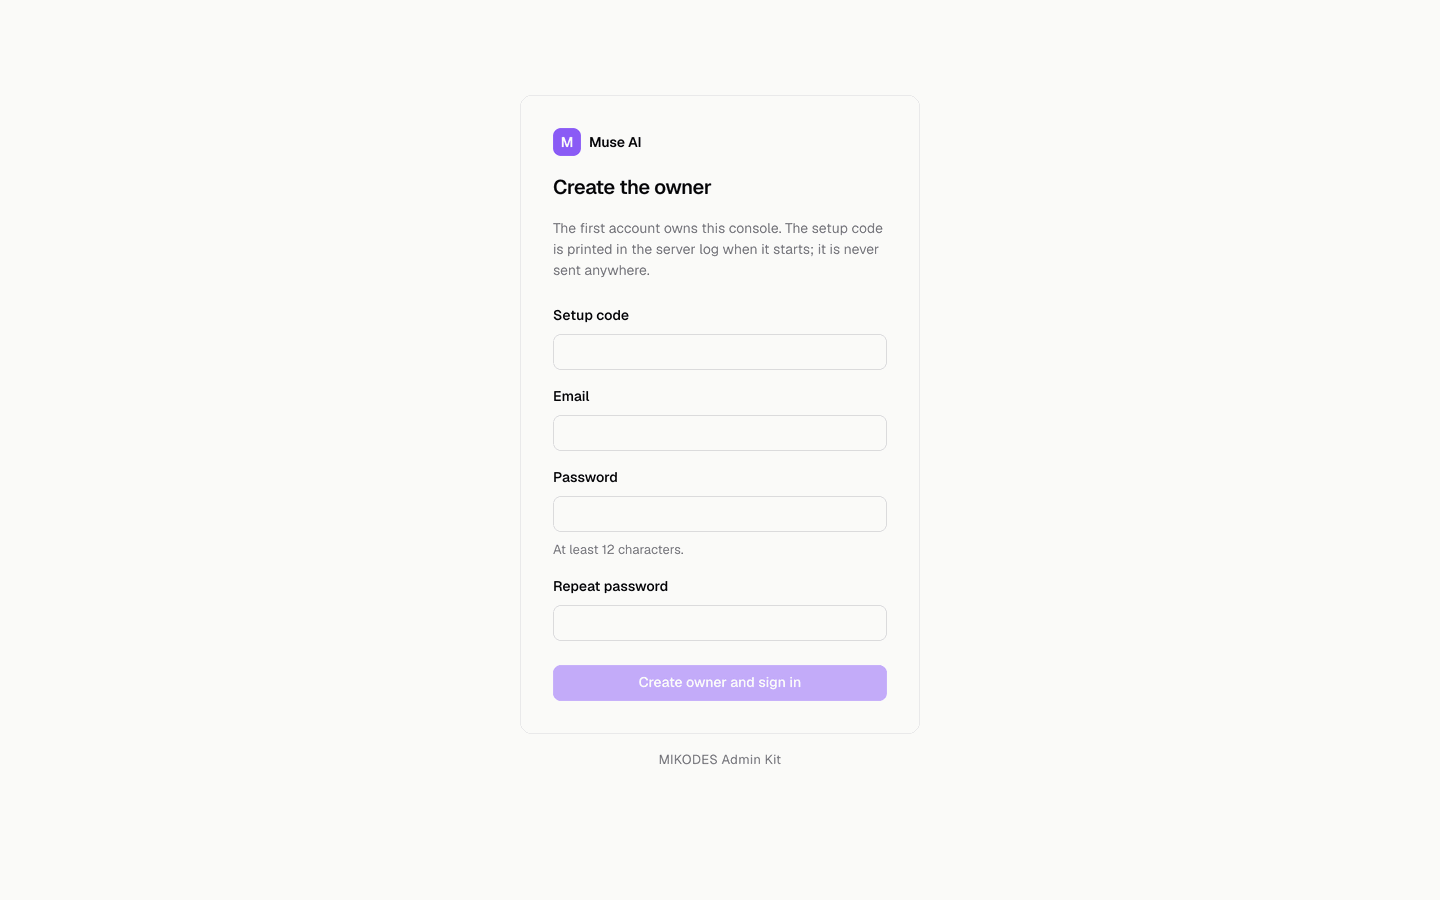
The log showsMuse AI console http://localhost:8790/admin,data: Firestore (service account), a one-time setup code, andconfig/public + config/private v<n> written(the number goes up with every save). - Create the ownerOpen
http://localhost:8790/admin, enter the setup code, your e-mail and a password of 12 or more characters. Each start before an owner exists prints a new code; any printed code works. - Turn on two-factorSecurity & alerts → Set up two-factor. The owner can set keys, so protect the account.
Running the console on a server instead of your computer: Deployment.
04Step 4 · Add your first AI key and enable a model
- Legal firstConsole → Legal: enter your Terms of service URL and Privacy policy URL. Save changes.
- Get a keyCreate an API key in your provider's dashboard; the click path for each provider is in Provider dashboards. The provider bills your own account for your usage.
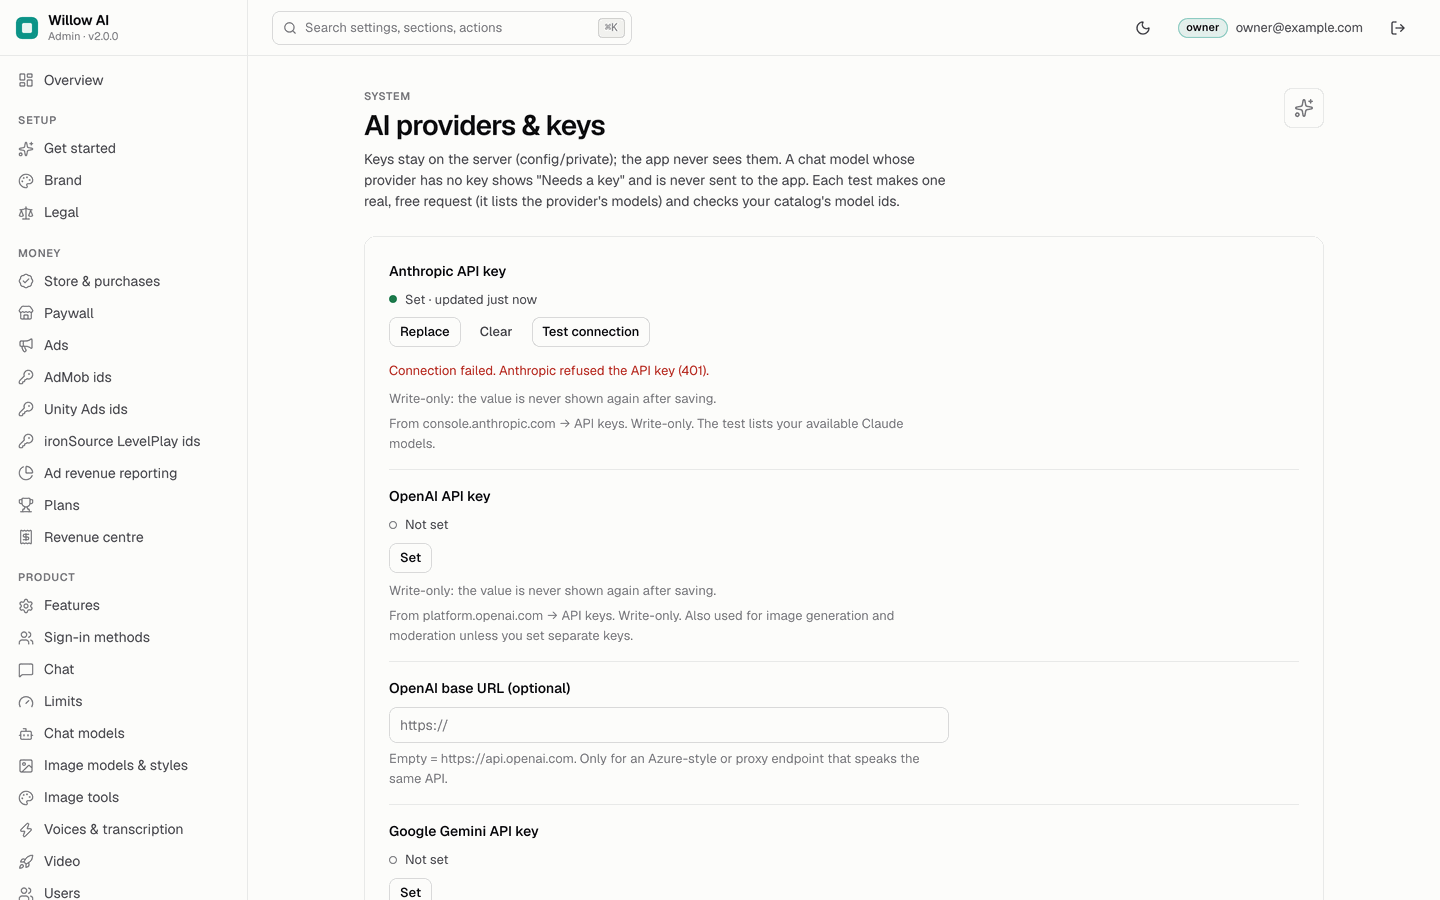
- Paste the keyConsole → AI providers & keys → Anthropic API key → Set, paste the key, then Save changes at the bottom. (Or OpenAI, Gemini, or a compatible endpoint: AI providers and models.)
- Test itClick Test connection. A good key answers "Anthropic accepted the key. … models available. Catalog models found: …". A wrong key answers "Connection failed. Anthropic refused the API key (401)."
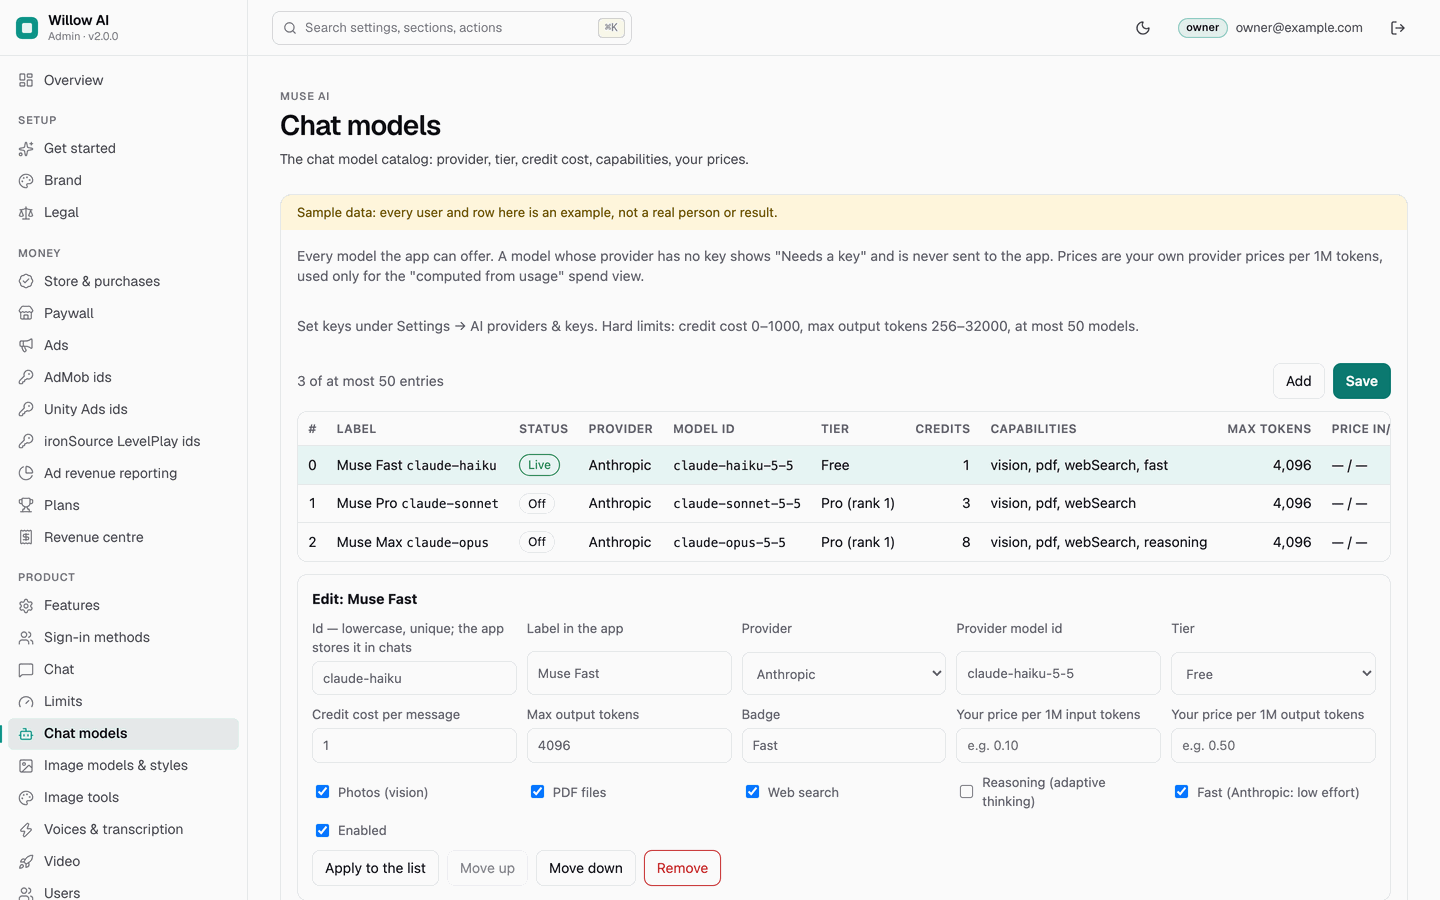
- Enable a modelConsole → Chat models → click the Muse Fast row → tick Enabled → Apply to the list → Save. Every model ships disabled. Keep at least one free model enabled, or users without a plan cannot chat.
- Images (optional)Set a key under Image providers & keys (OpenAI and Gemini fall back to the chat keys) and enable a model on Image models & styles. If you do not offer images, switch Features → Image generator off.
- Check StatusConsole → Status → Re-run checks. "At least one chat model is enabled and has a key" and "Anthropic key is valid" should pass.
Check: curl <API_BASE_URL>/v1/health now shows "ai":"ok", and curl <API_BASE_URL>/v1/config lists your model under models. The API caches the config for 60 seconds, and the app loads it when it starts.
05Step 5 · Connect and run the app
cd app
flutter pub get
dart pub global activate flutterfire_cli    # once
flutterfire configure                        # pick your project and Android, iOS (and web if you want)
Terminal: macOS or Linux as shown; on Windows use WSL or Git Bash (how).
flutterfire configure rewrites lib/firebase_options.dart and adds android/app/google-services.json and ios/Runner/GoogleService-Info.plist. Until you run it, the app shows "Connect your Firebase project". Change the app id first if you already know it (Release → ids), because the Firebase apps are registered under that id.
Start an Android emulator or connect a phone with USB debugging, then:
flutter run --dart-define=API_BASE_URL=https://us-central1-<your-project-id>.cloudfunctions.net/apiTerminal: macOS or Linux as shown; on Windows use WSL or Git Bash (how).
Without API_BASE_URL the app shows "Set your API address". With both in place, it opens the onboarding; after it, send a message. The answer comes from your provider, under the model's label.
Check: console → Overview shows today's chat message count going up, and Firebase console → Functions → Logs shows a line chat with status: "done" and token counts (never the text).
06Step 6 · Optional modules
Each of these needs its own provider key (your own account, your own usage bill) and ships switched off. Turn on only what you want to offer:
| Module | Console | Guide |
|---|---|---|
| Discover (news feeds with AI briefs) | Discover feeds page and settings, Features → Discover | Discover |
| Natural voices, transcription, auto captions | Voices & transcription page and settings, Features | Voice |
| AI video | Video page and settings, Features → AI video generation | Video Studio |
| Image edit, remove background, upscale | Image tools page and settings, Features | Image tools |
| Plans, credit packs, Remove ads | Plans, Paywall, Store & purchases | Plans and paywall, In-app purchases |
| Ads | Ads and the network id pages | Ads |
07Optional · Everything on your computer with the Firebase emulators
For development without a cloud project (needs Java 21+ and the Firebase CLI). Use three terminals:
cd firebase/functions && npm ci
npm run serve
# auth 9099, firestore 8080, storage 9199, functions 5001, project demo-museai
# API: http://127.0.0.1:5001/demo-museai/us-central1/api
Terminal: macOS or Linux as shown; on Windows use WSL or Git Bash (how).
cd admin
FIRESTORE_EMULATOR_HOST=127.0.0.1:8080 npm start
Terminal: macOS or Linux as shown; on Windows use WSL or Git Bash (how).
cd app
flutter run -d chrome --dart-define=USE_EMULATOR=true \
  --dart-define=API_BASE_URL=http://127.0.0.1:5001/demo-museai/us-central1/api
Terminal: macOS or Linux as shown; on Windows use WSL or Git Bash (how).
demo-museai is a Firebase "demo-" project id: the emulators run it without any cloud project. With USE_EMULATOR=true the app connects to the Auth and Firestore emulators even before flutterfire configure; on an Android emulator the host is 10.0.2.2 (set EMULATOR_HOST to override). The scheduled functions are listed but not triggered by the emulator.
08Optional · Run the tests
cd app && flutter analyze && flutter test
cd firebase/functions && npm test && npm run test:emu && npm run test:rules
cd admin && npm test && npm run test:emulator
Terminal: macOS or Linux as shown; on Windows use WSL or Git Bash (how).
Run each line from the source/ folder. The emulator and rules tests need Java 21+ and the Firebase CLI.